Hardware
- HUB0000 – VINT Hub
- RCC1000 – 16x RC Servo Phidget
- Lynxmotion AH2
- 12 Standard Size Servos
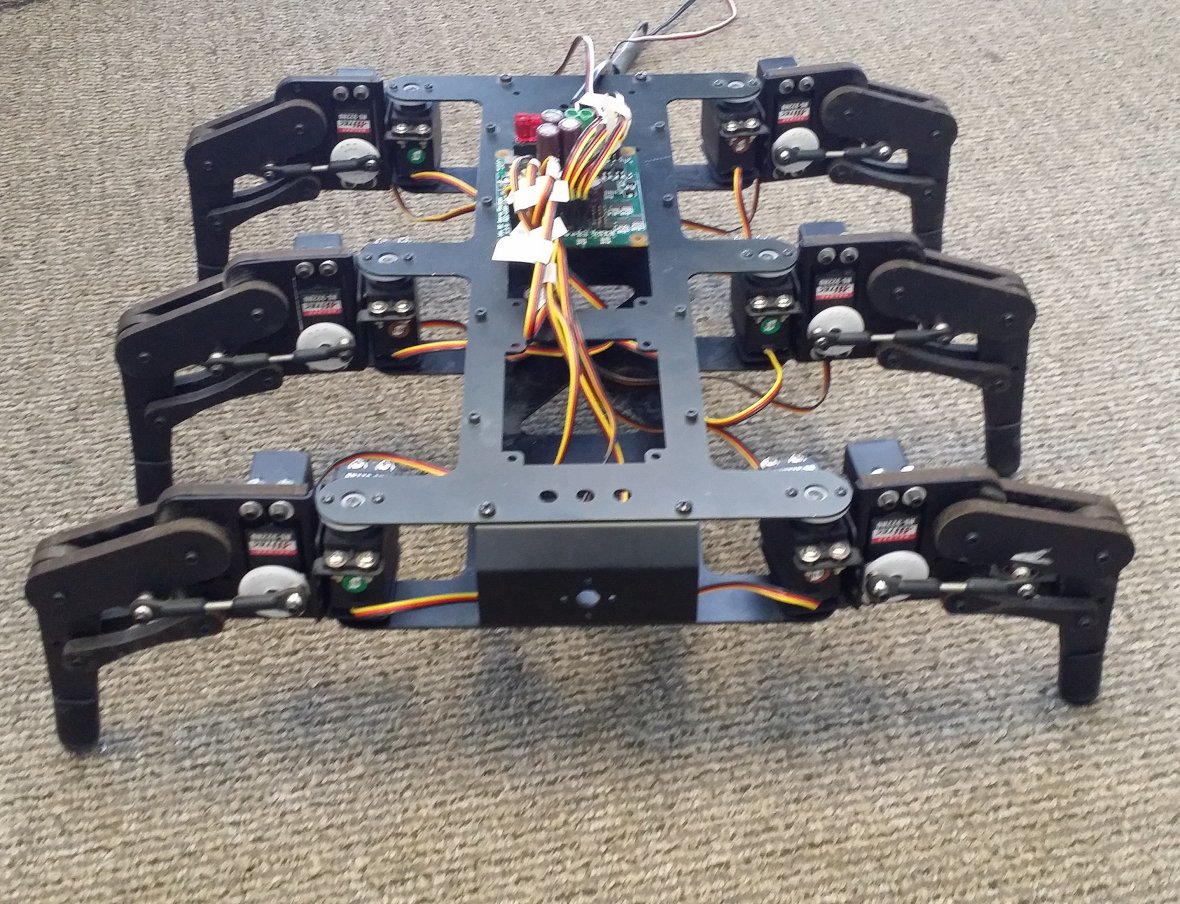
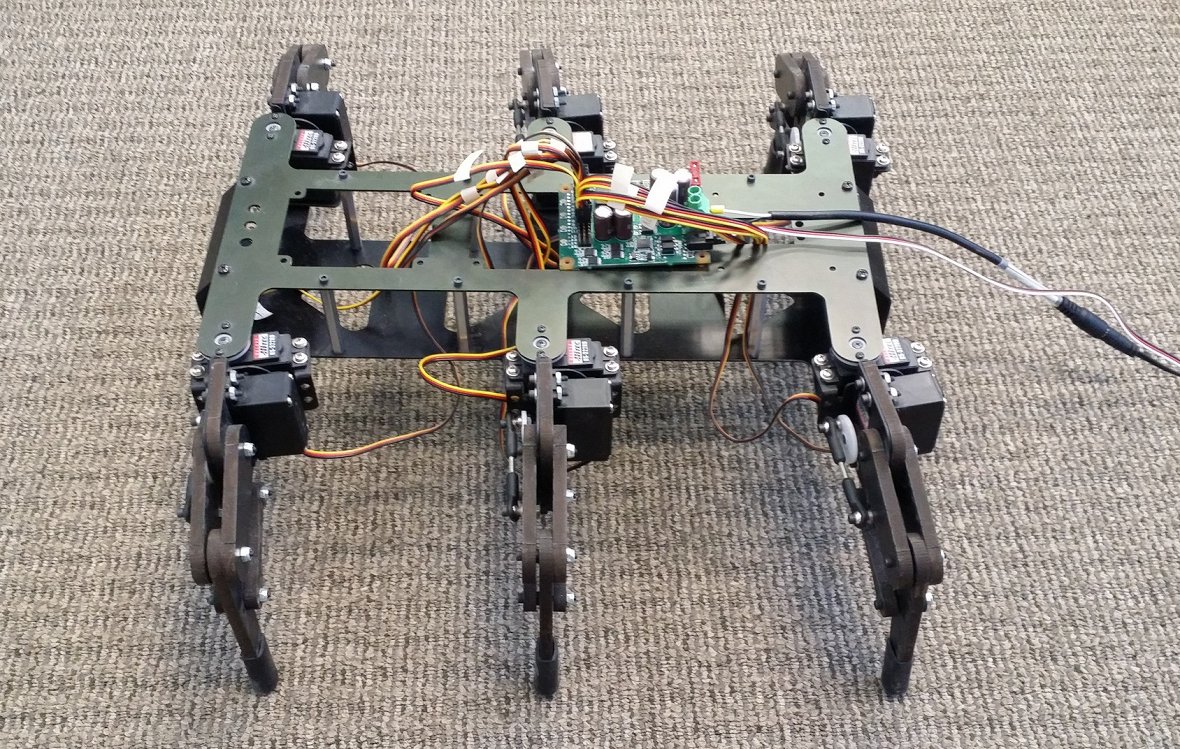
The hex walker is derived from the Lynxmotion AH2 walking robot. It features 6 legs using 12 servos for basic movement. These servos are plugged into the RCC1000 – 16x RC Servo Phidget, which in turn is plugged into a VINT Hub. For this project, the walker will be tethered to power and a long VINT cable for simplicity.
Software
Libraries And Drivers
This project assumes that you are somewhat familiar with the basic operation of Phidgets (i.e. attaching and opening devices, reading data, etc) and with running examples in the Phidget Control Panel .
Controlling The Hex Walker
The first step is to connect to the the twelve servo channels required to make the robot walk. For simplicity, the servos were connected in a specific patern to allow easy selection.
The next step of programming the robot to walk is to verify all servos move the right way. For this robot, it was found that the servos on the opposite sides of the robot were reversed. This is compensated for by reversing the signal to the servos on one side of the bot.
To assist with this, a leg-moving funciton was implemented as follows:
void setLegPos(PhidgetRCServoHandle* servos, int index, double pos) {
    legsDone[index] = 0;

    if (isHorizontal(index)) {
        if (!isLeftSide(index))
            pos *= -1;
        PhidgetRCServo_setTargetPosition_async(servos[index], 90 + pos, NULL, NULL);
    } else {
        if (isLeftSide(index))
            pos = 180 - pos;
        PhidgetRCServo_setTargetPosition_async(servos[index], pos, NULL, NULL);
    }
}
Note the use of the asynchronous calls to set servo positions (PhidgetRCServo_setTargetPosition_async) in order to better coordinate their movement.
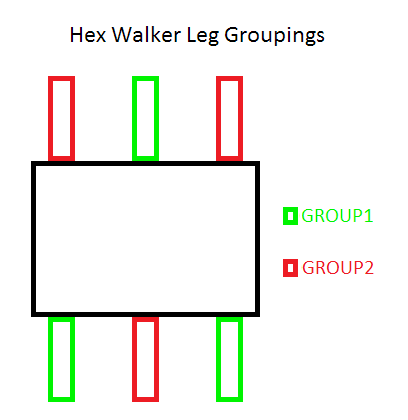
For movement, the legs are grouped in tripods consisting of the front and back legs of one side and the middle leg of the other. This ensures the robot remains stable at all times while it walks. In order to walk, the robot lifts one tripod and moves it forwards while simultaneously moving the legs on the ground towards the rear. Then, it repeats the same cycle for the next set of legs. This motion propels the robot forwards.
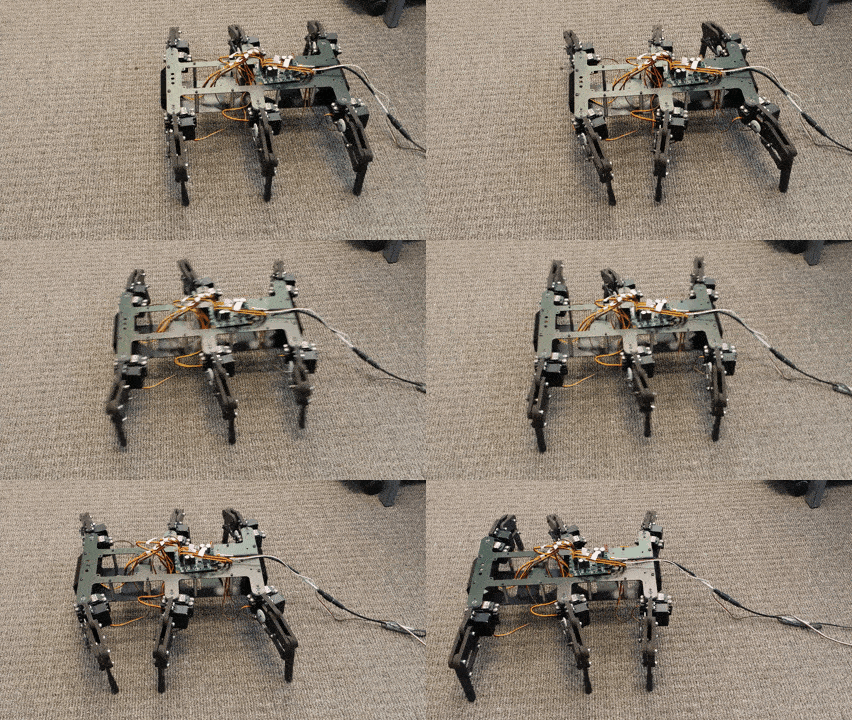 In order to turn, one tripod is lifted while the other set rotates in the given direction. To turn left, the right legs are moved forwards while the left legs are moved back, and vice-versa.
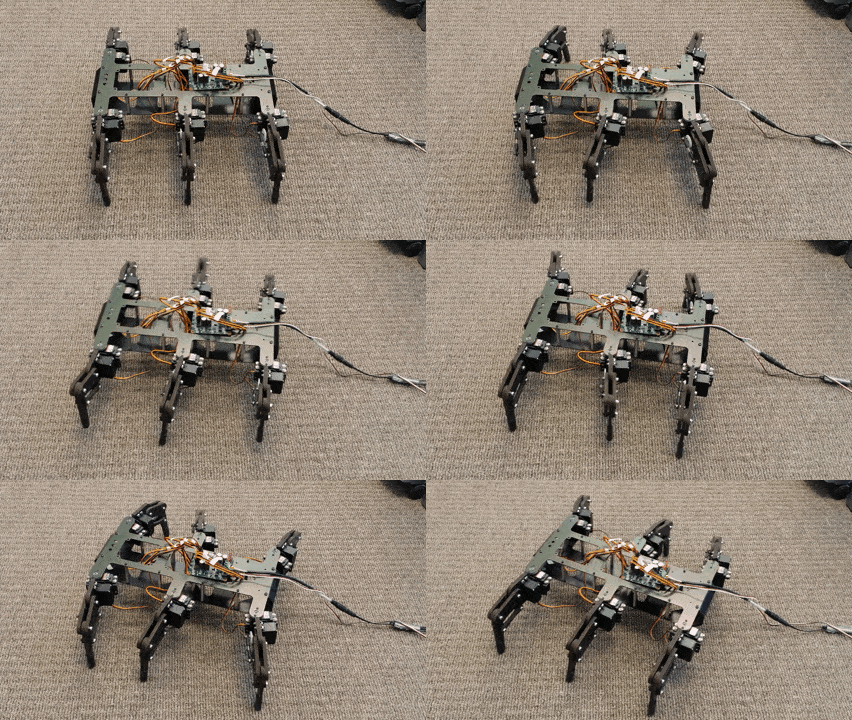 For control from the joystick, these movements are combined to allow for more freedom of motion.
The code snippet below shows how the walking algorithm is implemented for this demonstraiton. In this case, the joystick value is sampled and traslated into the relative size and direction of the step (velocity), with the turning amout (turnOffset) added to allow turning while on the move. In addition, if the joystick position is close to centre, the robot will enter a NEUTRAL state, where the legs won’t move until there is more input.
void walk(PhidgetRCServoHandle* servos, PhidgetVoltageRatioInputHandle* axes) {
	double turnOffset;
	double velocity;
	double yAxis;
	double xAxis;

	PhidgetVoltageRatioInput_getVoltageRatio(axes[0], &xAxis);
	PhidgetVoltageRatioInput_getVoltageRatio(axes[1], &yAxis);

	turnOffset = xAxis;
	velocity = yAxis;

	if (!checkLegsDone())
		return;

	//If the joystick is centred, force input to zero
	if (fabs(xAxis) < 0.1 && fabs(yAxis) < 0.1) {
		velocity = 0;
		turnOffset = 0;
		//Set stepTracker to NEUTRAL after movement to allow legs to centre themselves first
	}

	//If stopped and there is new input, start with GROUP1
	if (stepTracker == NEUTRAL && velocity != 0 && turnOffset != 0)
		stepTracker = GROUP1;

	//Perform the step
	if (stepTracker == GROUP1 || stepTracker == GROUP2)
	{
		if (stepTracker == GROUP2)
			turnOffset *= -1;

		//Start lifting legs
		setLegPos(servos, tripod[stepTracker][V][F], VMAX/4);
		setLegPos(servos, tripod[stepTracker][V][M], VMAX/4);
		setLegPos(servos, tripod[stepTracker][V][R], VMAX/4);

		waitLegsDone();
		//Move all legs to next positions, finish raising legs
		setLegPos(servos, tripod[stepTracker][V][F], VMAX);
		setLegPos(servos, tripod[stepTracker][V][M], VMAX);
		setLegPos(servos, tripod[stepTracker][V][R], VMAX);

		//Move raised legs to their next positions
		setLegPos(servos, tripod[stepTracker][H][F], HMAX * (velocity + turnOffset));
		setLegPos(servos, tripod[stepTracker][H][M], HMAX * (velocity - turnOffset));
		setLegPos(servos, tripod[stepTracker][H][R], HMAX * (velocity + turnOffset));

		//Move grounded legs to move the robot
		setLegPos(servos, tripod[!stepTracker][H][F], HMAX * ((-velocity) + turnOffset));
		setLegPos(servos, tripod[!stepTracker][H][M], HMAX * ((-velocity) - turnOffset));
		setLegPos(servos, tripod[!stepTracker][H][R], HMAX * ((-velocity) + turnOffset));

		waitLegsDone();

		//Put raised legs down
		setLegPos(servos, tripod[stepTracker][V][F], 0);
		setLegPos(servos, tripod[stepTracker][V][M], 0);
		setLegPos(servos, tripod[stepTracker][V][R], 0);
		//Decide to take another step or wait for further input
		if (velocity == 0 && turnOffset == 0)
			stepTracker = NEUTRAL;
		else
			stepTracker = ((stepTracker == GROUP1) ? GROUP2 : GROUP1);
	}
}
In addition to walking, when the joystick button is pressed the walker crouches and tilts in the direction of the joystick. Once the button is released, the walker stands up and continues walking. This is accomplished by bending the legs on one side of the bot while extending those on the other, as follows:
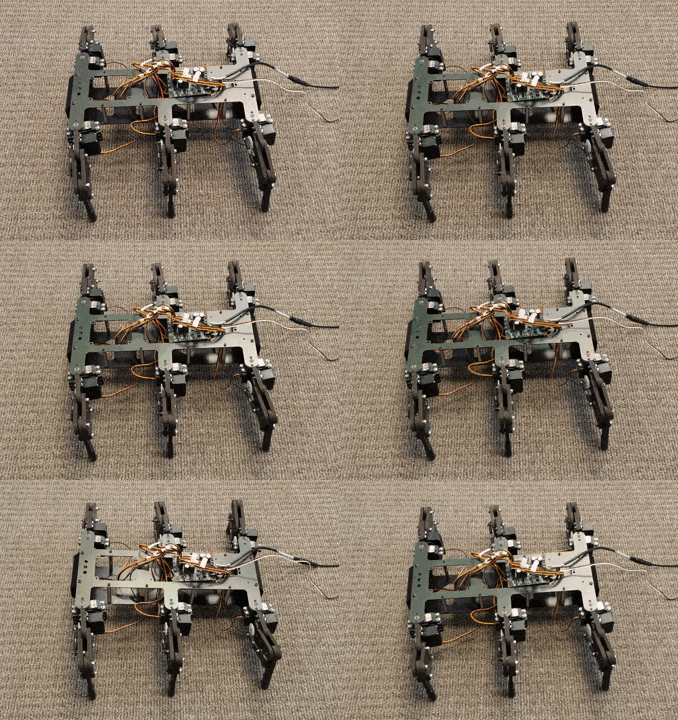
void lean(PhidgetRCServoHandle* servos, PhidgetVoltageRatioInputHandle* axes) {
	double yAxis;
	double xAxis;

	PhidgetVoltageRatioInput_getVoltageRatio(axes[0], &xAxis);
	PhidgetVoltageRatioInput_getVoltageRatio(axes[1], &yAxis);

	if (!crouched) {
		//set vertival servos to high speed for better tracking of the joystick
		for (int i = 0; i < NUM_SERVOS; i++) {
			if(!isHorizontal(i))
				PhidgetRCServo_setVelocityLimit(servos[i], 9000);
		}
	}

	setLegPos(servos, LFV, (VMAX / 2) + (xAxis * -(VMAX / 4)) + (yAxis * (VMAX / 4)));
	setLegPos(servos, RFV, (VMAX / 2) + (xAxis *  (VMAX / 4)) + (yAxis * (VMAX / 4)));

	setLegPos(servos, LMV, (VMAX / 2) + (xAxis * -(VMAX / 4)));
	setLegPos(servos, RMV, (VMAX / 2) + (xAxis *  (VMAX / 4)));

	setLegPos(servos, LRV, (VMAX / 2) + (xAxis * -(VMAX / 4)) + (yAxis * -(VMAX / 4)));
	setLegPos(servos, RRV, (VMAX / 2) + (xAxis *  (VMAX / 4)) + (yAxis * -(VMAX / 4)));
	crouched = 1;
}

void standUp(PhidgetRCServoHandle* servos) {

	if (crouched) {
		for (int i = 0; i < NUM_SERVOS; i++) {
			if (!isHorizontal(i))
				PhidgetRCServo_setVelocityLimit(servos[i], 360);
		}

		setLegPos(servos, LFV, 0);
		setLegPos(servos, RFV, 0);

		setLegPos(servos, LMV, 0);
		setLegPos(servos, RMV, 0);

		setLegPos(servos, LRV, 0);
		setLegPos(servos, RRV, 0);

		crouched = 0;
	}
}
The program is controlled by a simple loop that determines the next action based on the state of the joystick button.
while (!kbhit()) {
    PhidgetDigitalInput_getState(button, &buttonState);
    if (!buttonState) {
        if (crouched)
            standUp(servos);
        walk(servos, axes);
    } else
        lean(servos, axes);

    ssleep(0.02);
}
For a leg up on similar projects, you can download the source code for this project: Download Source Code


